The venerable Hitachi HD44780 LCD has been around for a long time (1987 according to Wikipedia ). At one point it was in quite a few consumer electronic devices, and while it may not be as glamorous as the more advanced capacitive touch HD displays (which seem to be in everything nowadays), it still has a lot going for it. One benefit of it's longevity in the marketplace is a plethora of online documentation and tutorials on how to use it. You can also find them for sale by just about all of the online electronics component retailers. There are also a ton of companies that make them. In fact it seems that you can find them made by almost everyone except Hitachi themselves. Regardless of the company producing them, they should all work the same way in terms of the command/communication scheme used by the built-in controller (in theory anyway.) When I first used one of these a couple of years ago (at the time of writing this) I found it frustrating that none of the online documentation (particularly regarding the initialization procedure) seemed to give me a working device. You will find some slight differences in how people get these things initialized. Whether it was due to ignorance on my part or internal differences in the manufacturing of the LCDs by different parties, I eventually did arrive at some code that works for the devices I purchased.
4 bit and 8 bit mode
The 44780 can be used in either 4 or 8 bit "mode". The commands used are 8 bits in length, but when configured in 4 bit mode you can communicate by breaking the commands/data into 2 separate 4 bit transmissions. The benefit of 4 bit mode is less wires needed to make a connection with the MCU, which frees up more pins on your microcontroller. The downside is slower transmissions speeds between the MCU and LCD module. I have never bothered with 4 bit mode as it is a little more of a hassle to implement as far as the code goes and I have not yet run into the issue of not having enough free pins on my MCU. In the future I will perhaps update this tutorial to include the 4 bit mode, but at the moment this is the last I will mention of it. Everything from here on out assumes 8-bit mode operation. You will also see variants of the 44780 that are rigged to communicate via serial protocols like i2c or SPI. Those are also not covered here.
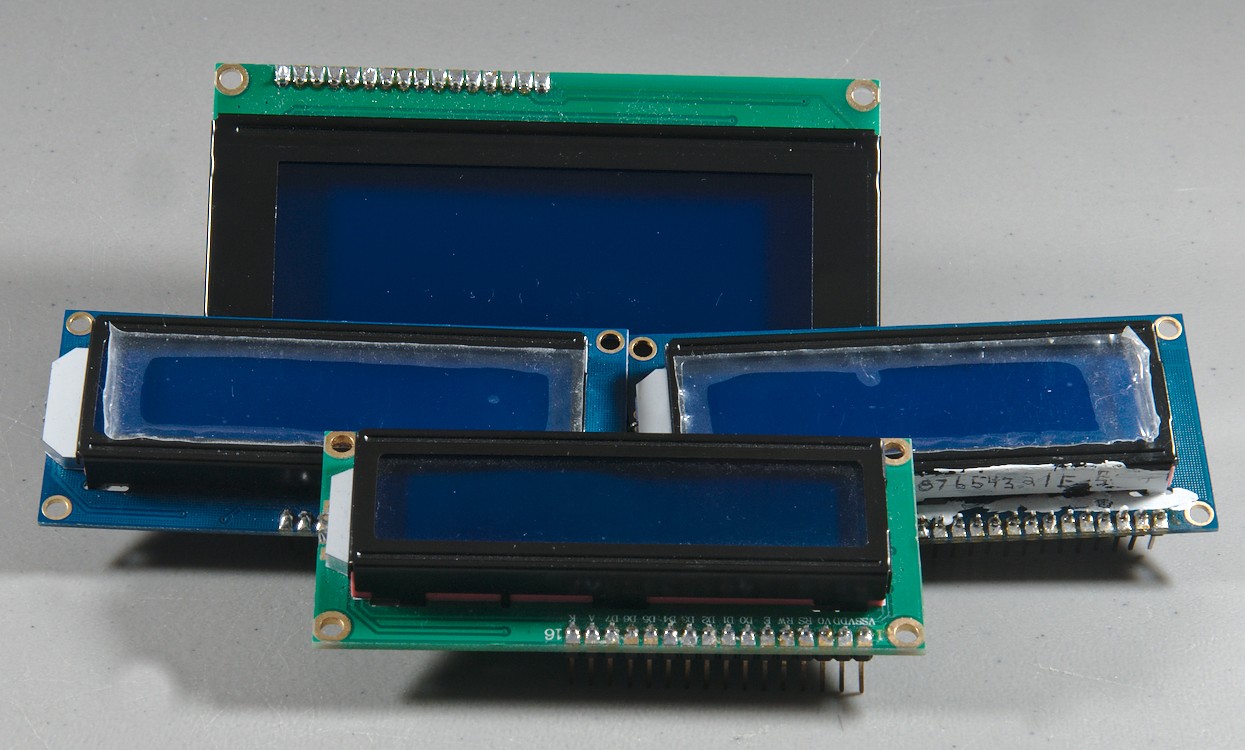
You can also find the 44780 in different configurations regarding the number of lines and character width. The specific type I am using for this tutorial is a 20x4. That is 20 characters across by 4 lines wide. You can see the actual device below:

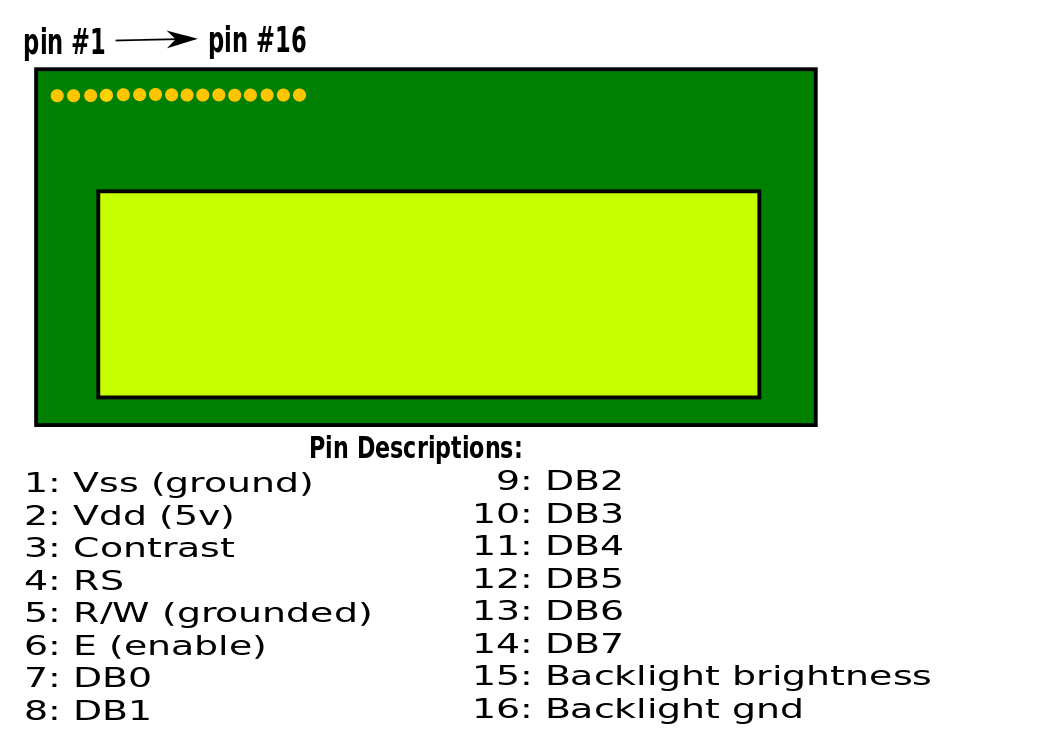
44780 Pin Diagram
Before proceeding let's first take a look at the 16 pins we need to become familiar with.
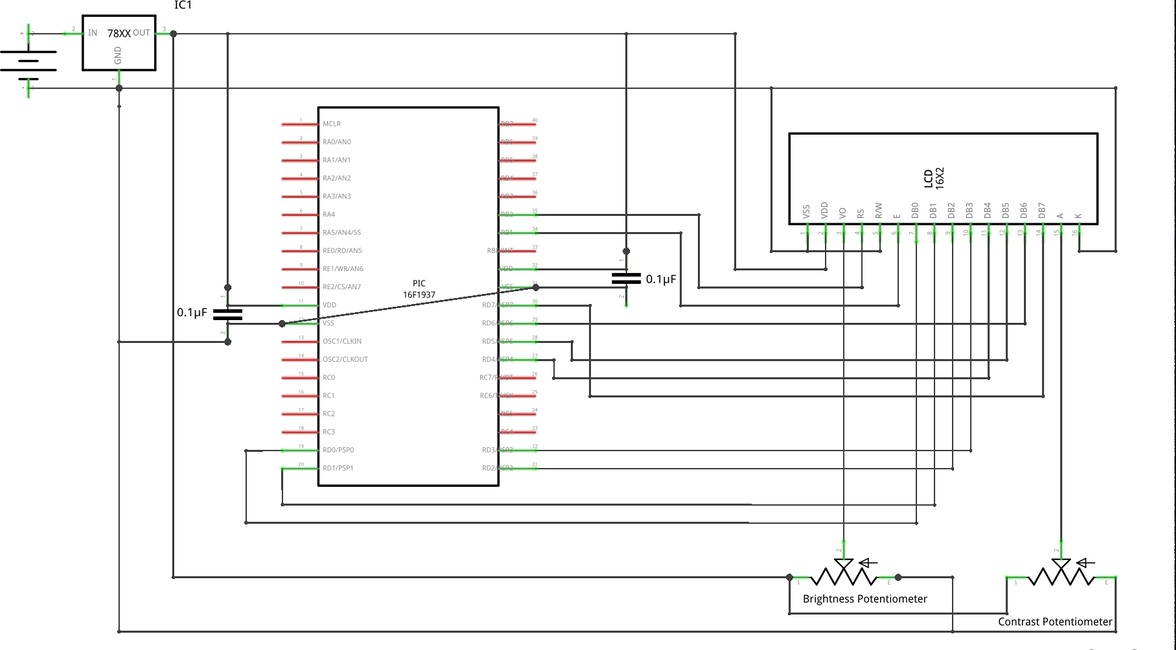
The connections between our PIC16F1937 and the LCD will be as follows:
| LCD/MCU Conections | |||||||||||||||
|---|---|---|---|---|---|---|---|---|---|---|---|---|---|---|---|
| MCU Pins | LCD Pins | ||||||||||||||
| PORTB, 2 | RS | ||||||||||||||
| PORTB, 1 | E | ||||||||||||||
| PORTD, 0 | DB0 | ||||||||||||||
| PORTD, 1 | DB1 | ||||||||||||||
| PORTD, 2 | DB2 | ||||||||||||||
| PORTD, 3 | DB3 | ||||||||||||||
| PORTD, 4 | DB4 | ||||||||||||||
| PORTD, 5 | DB5 | ||||||||||||||
| PORTD, 6 | DB6 | ||||||||||||||
| PORTD, 7 | DB7 | ||||||||||||||
The wiring diagram can seen below:
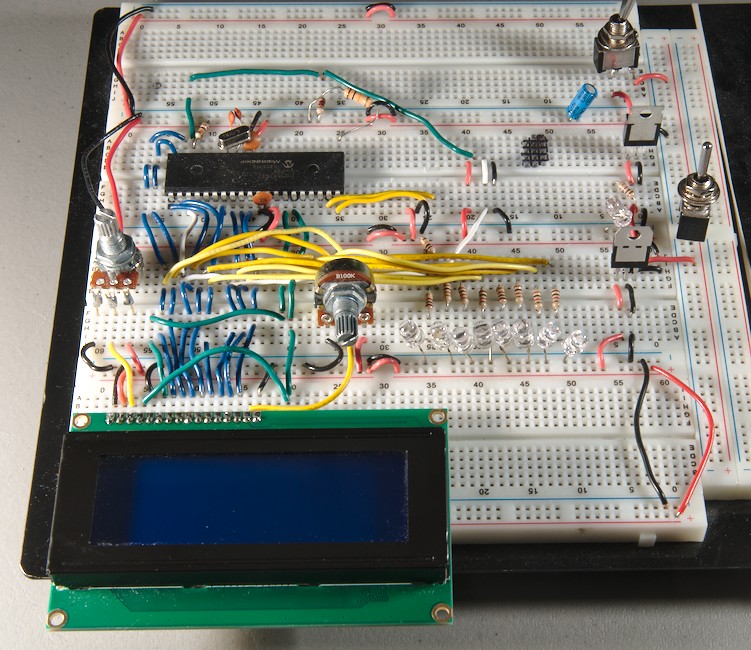
Lastly, you can see the bread-board setup I used for testing (ignore some extra wires connected to the i2c pins of the PIC16F1937 that I was using for another purpose):
In the next section we will explore the code required to initialize and use the 4480