What follows is an overview of the steps involved in rebuilding the Aisan carburetor found on a 1986 (and other years) Toyota pickup with the 22R motor. I will explain some pitfalls I encountered along the way. Be advised that there can be minor differences in parts and assembly/disassembly depending on the year of manufacturer ,automatic vs. manual transmission, and the regional market in which the vehicle was sold.
Removal from Engine
Part 1 (Remove air cleaner assembly and throttle linkage):
The first step involves the straight-forward process of removing the air cleaner assembly and throttle cable linkage at the back of the carburetor. I didn't get any photos of this process but it's easy enough. The throttle-cable linkage is removed via a couple of bolts that hold down the pulley and arm-mechanism that interfaces with the back side of the carburetor. There is also a small clip at the end of the u-shape arm that keeps it attached to the "coupler" on the back-side of the carb. The first thing I did after this was take photos of every possible angle of the carburetor to use a visual reference once the time comes to re-mount it to the engine. These photos are shown below:
Part 2 (On-truck Reference Photos):
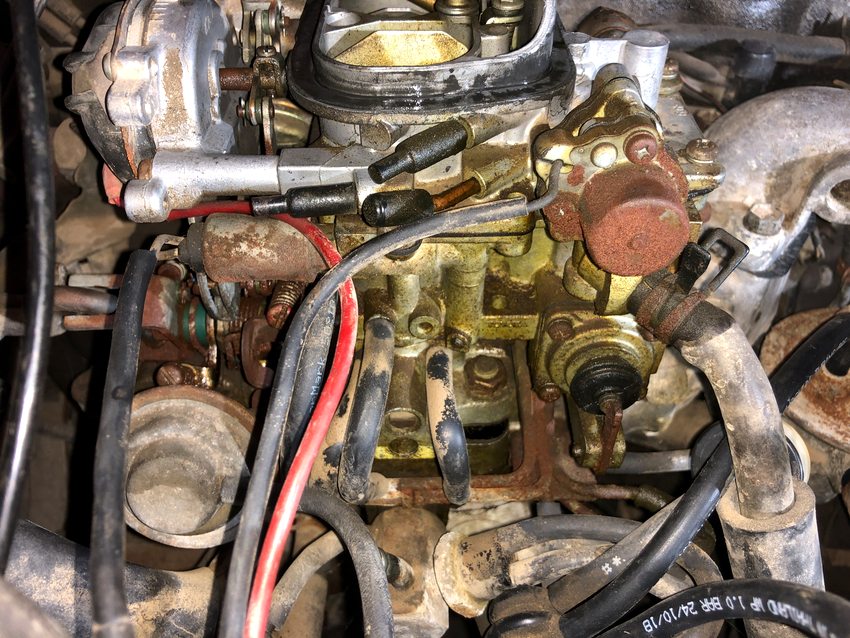
Front side of carburetor
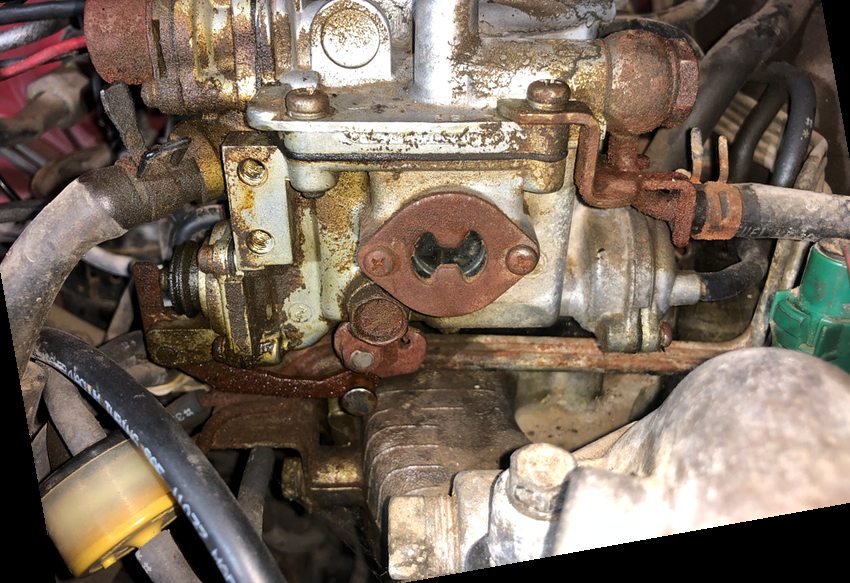
Driver's side of Carburetor:
Right side of photo below shows throttle cable linkage that needs to be removed.
Passenger's side of Carburetor:

Rear View of Carburetor:
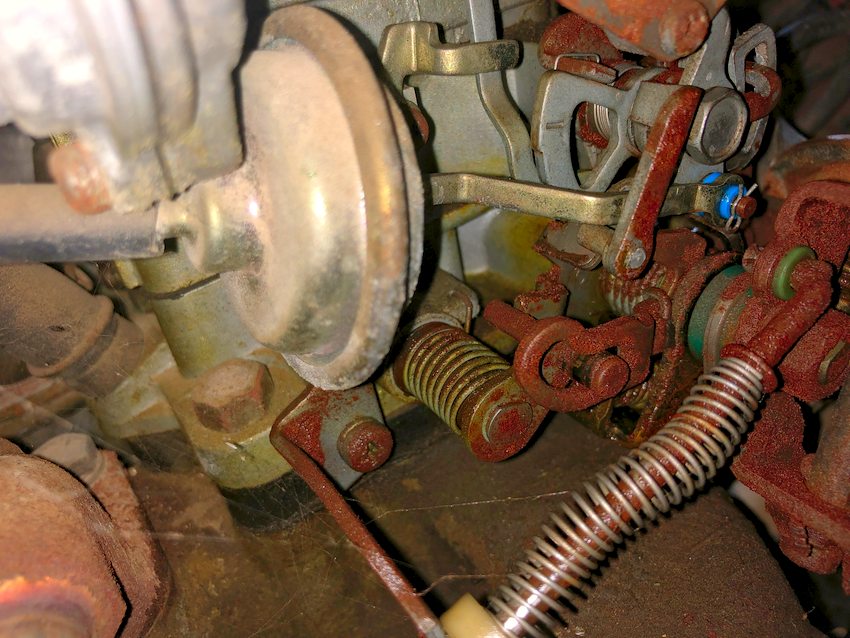
In the photo below you see can see a small portion of the clip that needs to be removed from the end of the u-shaped throttle-arm in order to remove it from the carburetor
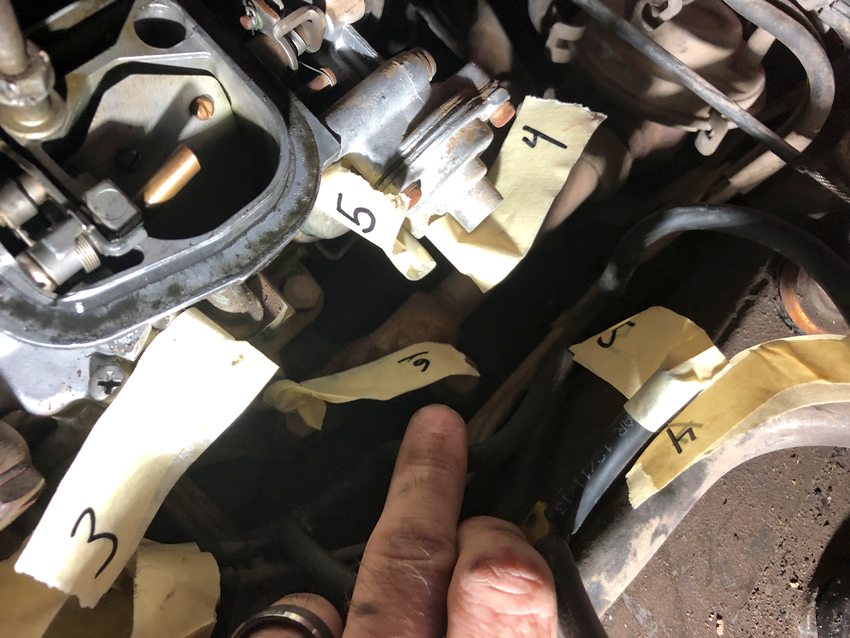
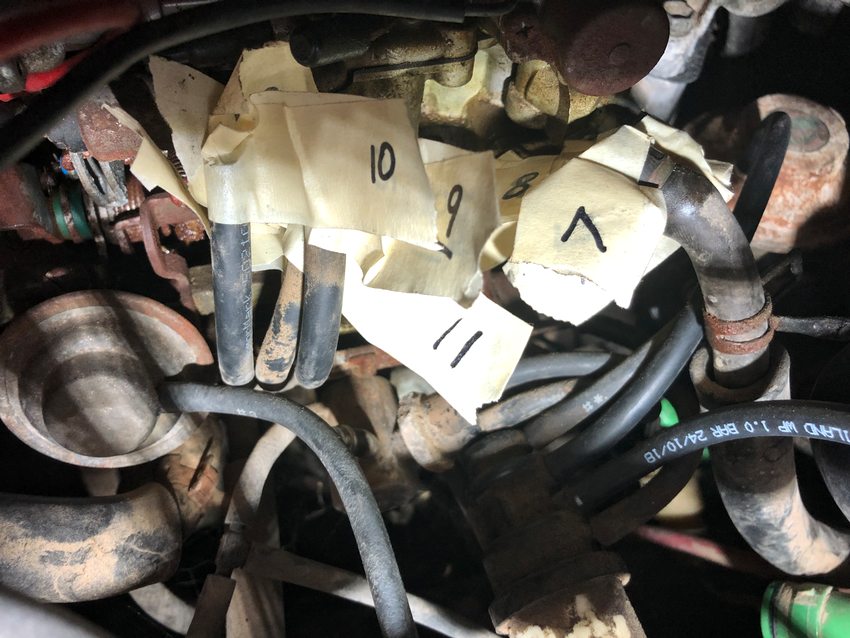
Part 3 (Label, record and remove all vacuum, emissions and fuel lines):
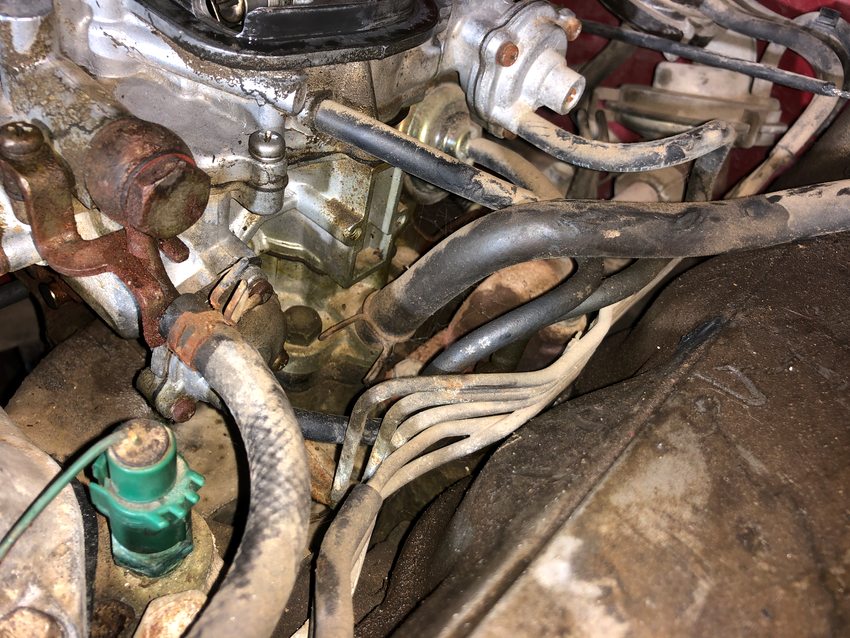
Next I used masking tape to make numbered tags for all hose/line connections to the carburetor. Each port on the carburetor got a number that matched up to a tag with the same number for the corresponding engine bay connection point. The numbers I used aren't important, just use some sort of marking system that will aid you in reconnecting everything later on. Once you get the carb out of the engine compartment, I recommend taking photos of all sides of the carburetor with the labeled ports. Of course once you begin cleaning the carburetor, the tags will need to be removed, but you will still have the photos as a reference when you need to match all the connections later. Placing the masking tape over the ends of the hoses will also prevent unwanted debris from getting inside the lines. A couple of example photos are shown below:
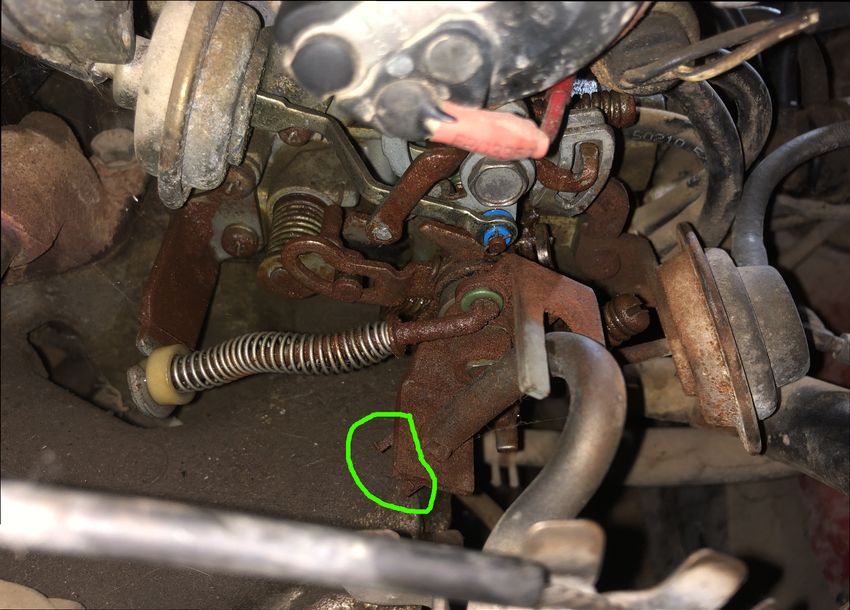
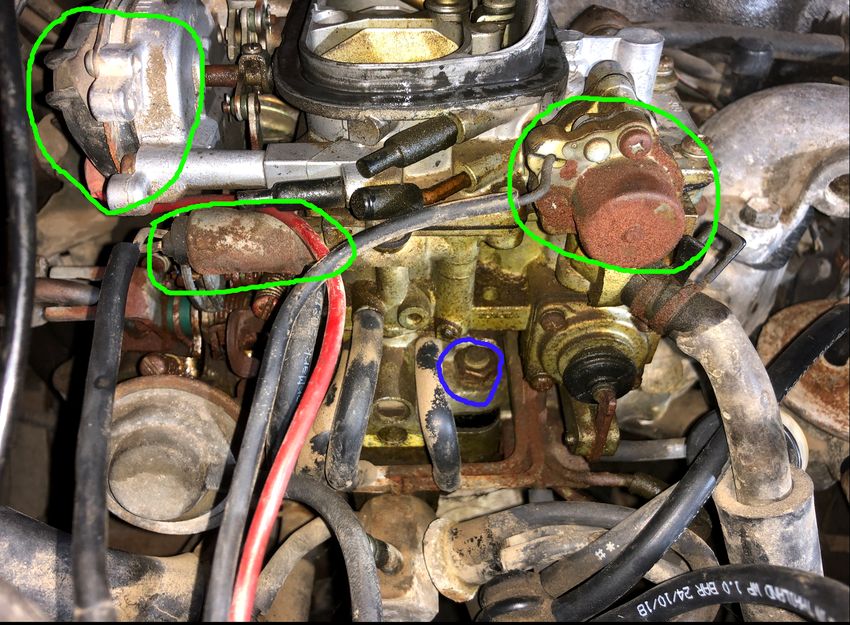
Part 4 (Unhook any electrical connections and remove carburetor from engine):
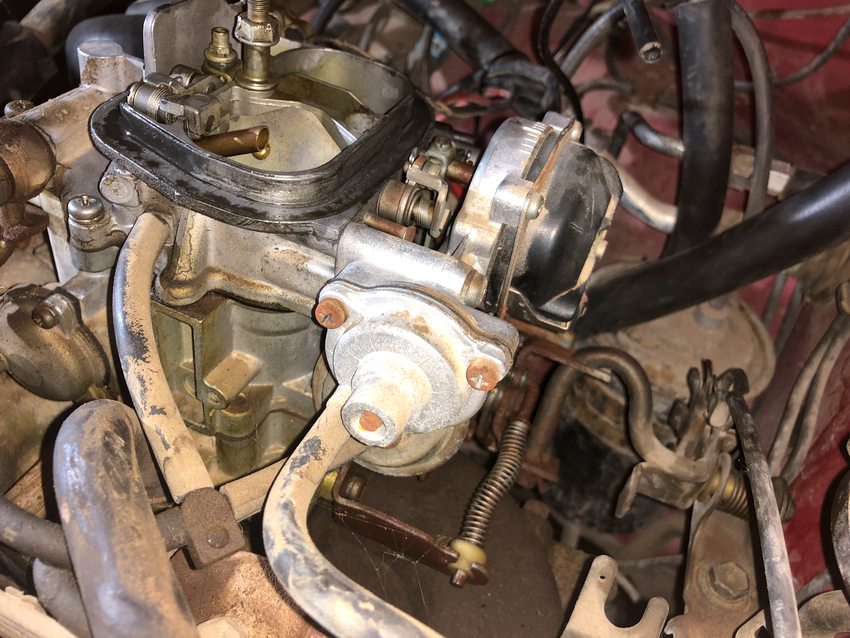
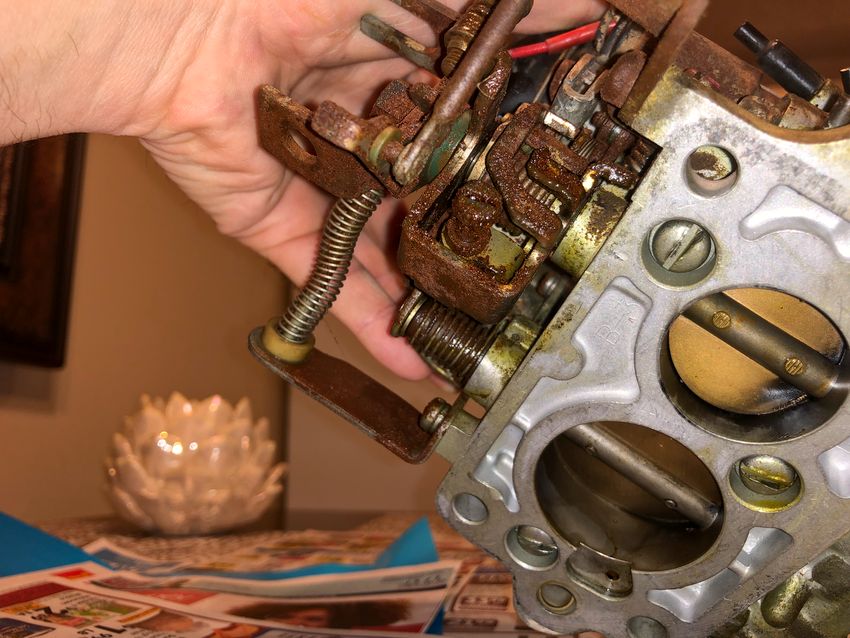
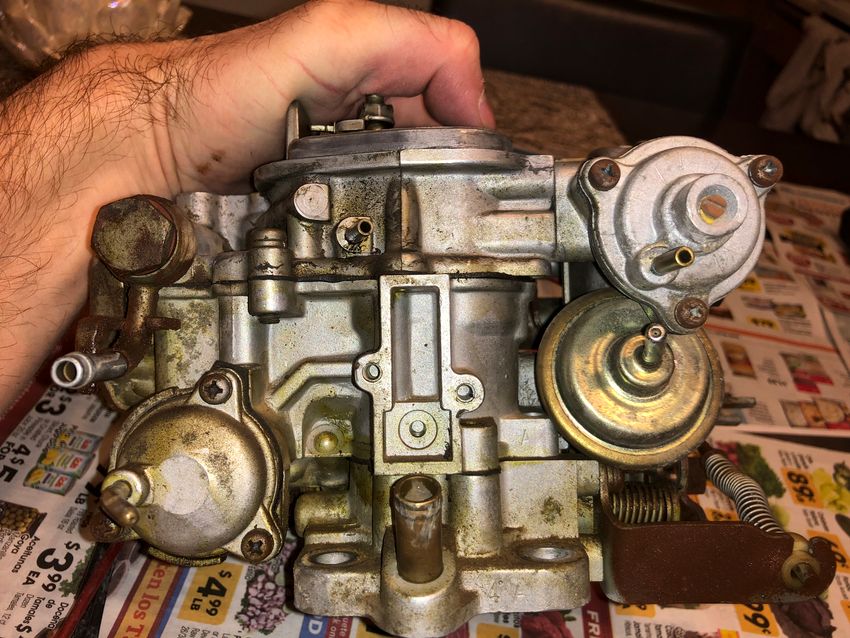
On my carburetor, there are three electrical components. 1) Fuel cutoff solenoid, 2) Bowl vent solenoid, and 3) the electrical choke mechnism. All three devices have lines that run into a single connector that can be unplugged. Simply follow the lines to the connector and unplug it. The three electrical devices are circled in green below (Shown from passenger side of carburetor). Also, circled in blue is one of the four mounting bolts that needs to be undone in order to lift the carburetor out of the engine. The other three are found on the remaining three corners of the base of the carb. Remove them and lift the carburetor away from the engine.
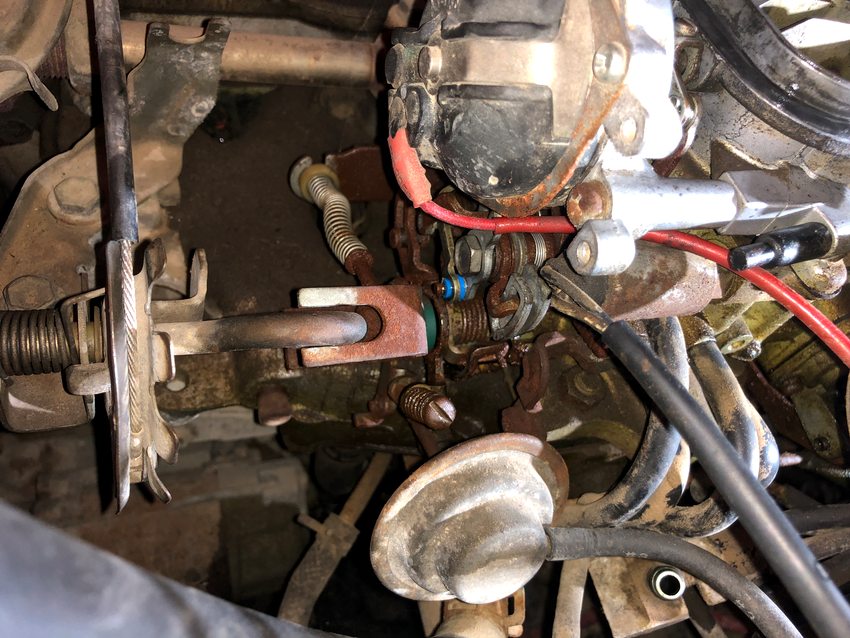
Part 5 (Take more reference photos with carburetor removed from truck):
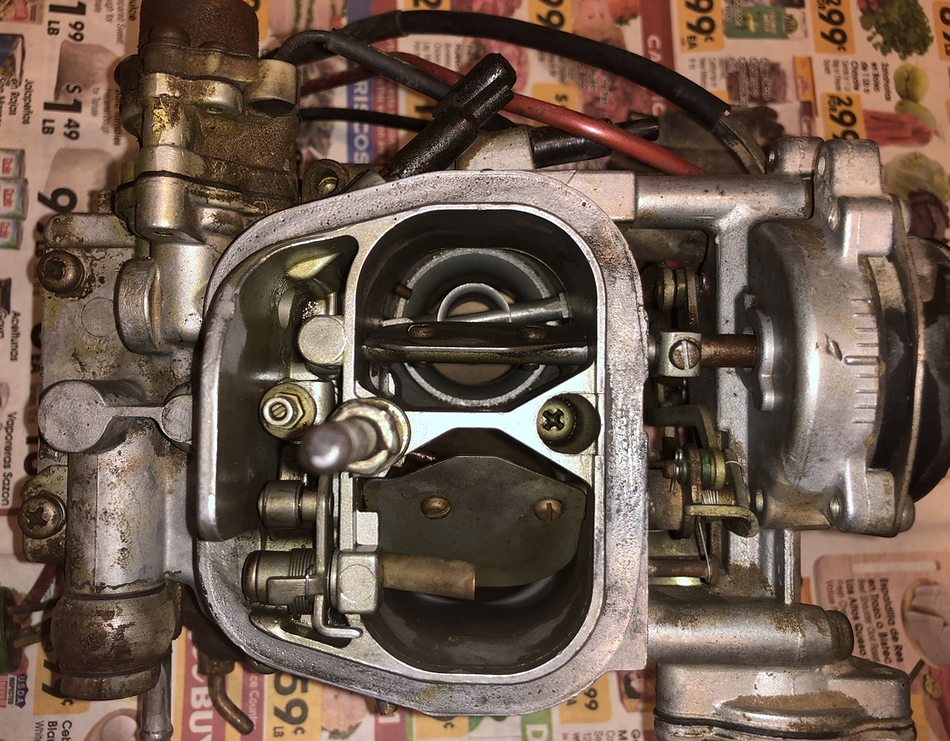
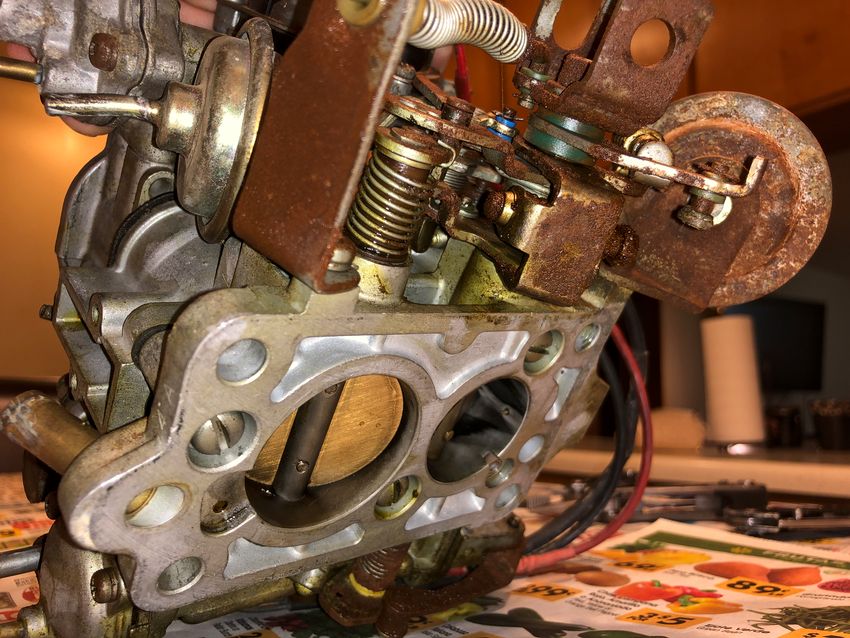
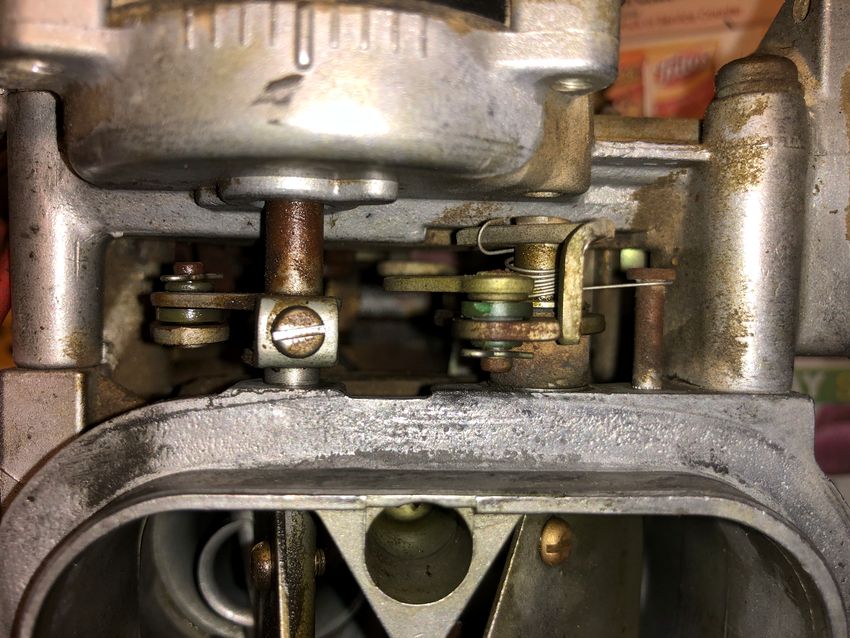
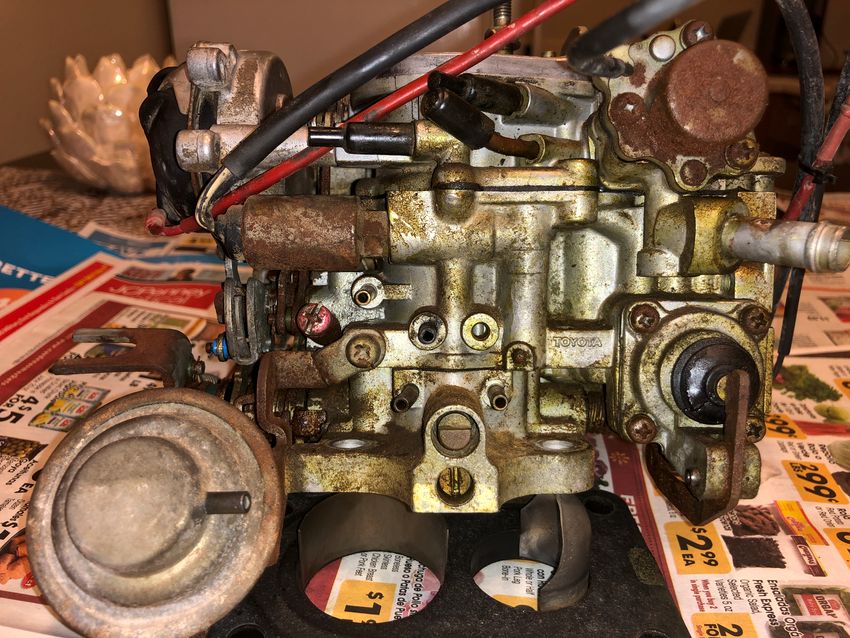
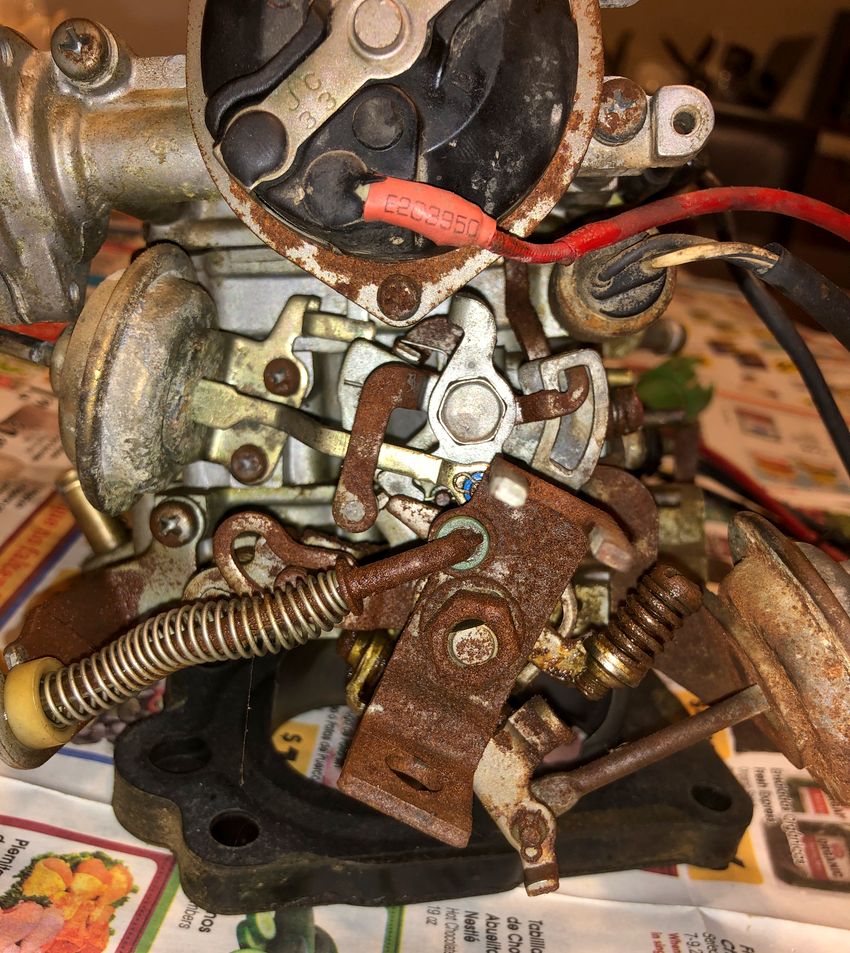
With the carburetor removed from the vehicle, now is your last chance to get as many detailed photos from every angle of the unit before you start tearing it apart. If this is your first time rebuilding the Aisan carburetor, don't neglect to do this! You will be amazed at how many important spring and linkage connections can be obscured from a simple straight-on shot. Hold the body of the carb at different angles and get as many up close photos as possible (Particularly of the complex throttle/choke linkages on the back-side). When springs and link arms start falling off you will be glad to have the references. As you start removing parts, continue to take photos every step of the way as it will be a helpful aid during reassembly. Here are some of mine below:
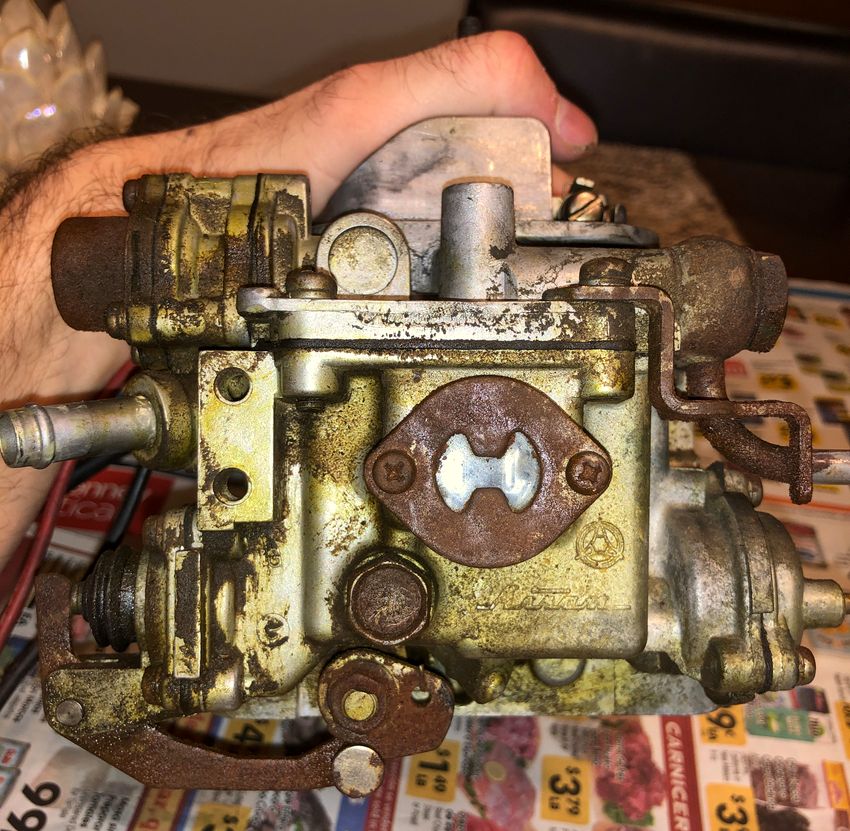

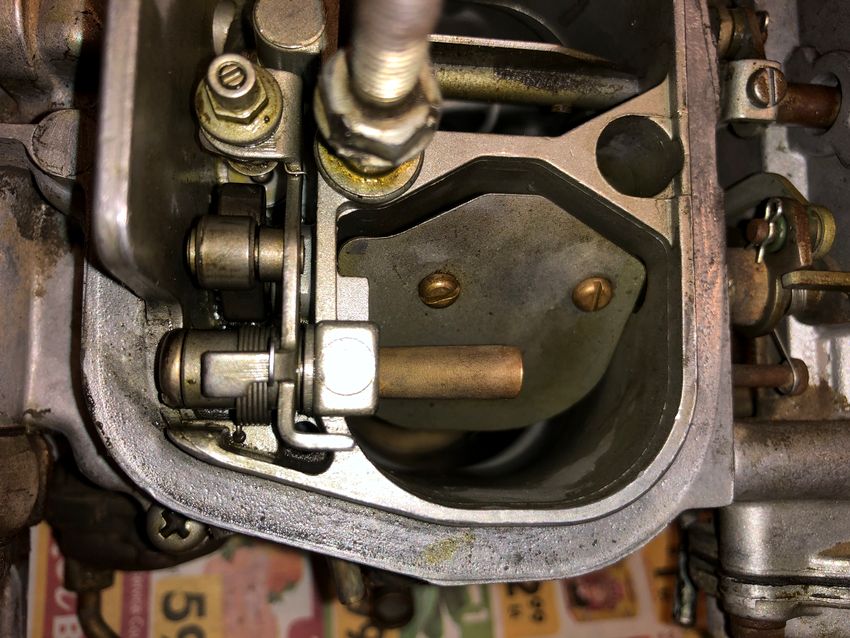
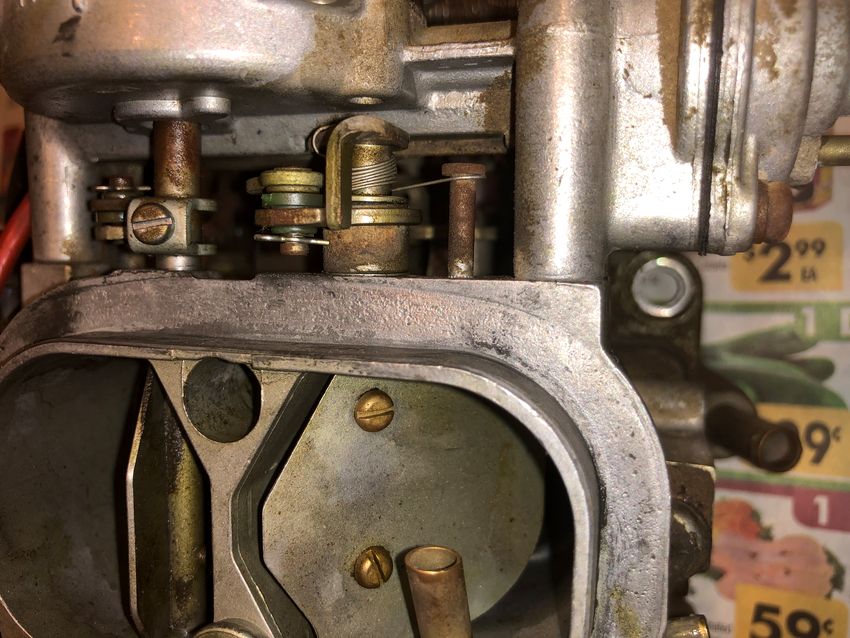

Note: The three ports towards the top of the carb are for the Hight Altitude Compensation System. My model didn't have this system so these ports were already capped off.

Next up will begin the disassembly of the carburetor.