A note about the ROV project documentation:
When I first started documenting this project on my website, I intended to explain every step of the process (both physical construction and software development) in as much detail as possible. I believed that doing so would better help anyone who wanted to attempt this for themselves and clear up any confusion (particularly regarding the code.) Such detailed documentation has presented challenges however. Foremost is that I myself am learning as I go (having never built an ROV from scratch before.) At least several times now I have scrapped or rewritten significant portions of the code as I find bugs or come up with a more efficient/better way of implementing a particular task. All of this makes for a very laborious effort in maintaining this website, and as a result I have decided to explain things in more brief and "abstract" manner with links to my assembly code files as references (as opposed to posting screen shots of code and giving a detailed explanation in paragraph form.) I will still post certain screen shots and make an effort to explain things as best as possible, but mostly I will assume a certain amount of effort on the part of the reader in terms of examining the code on their own and gaining a basic understanding through some trial and error/effort. If at some point I feel that a particular part of the software will be more or less "frozen" and unlikely to be significantly changed in the future, I may come back and provide more detailed explanations. At this stage however, there is little chance that anything about the project will remain frozen for long, which is why I have decided to change my approach to documentation.
UPDATE (10/09/2022):
After over four years, this project has reach "end of life" status due to time and resource constraints. All design files (source code, schematics and repository) are effectively frozen and will not be updated or developed further.
So why an ROV?
I was looking for a project that would provide a significant challenge, but at the same time not be so daunting as to be nearly impossible given my skill set. To be quite frank, it has proven to be a bit more daunting than I originally imagined (funny how that works), but in an encouraging way that has caused me to learn quite a bit. The list of topics that I had almost zero prior knowledge of before tackling a submersible vehicle was quite large. Serial protocols, voltage drop across long lengths of wire, brushless DC motors, electronic speed controllers and many more... It goes to show that the best way to learn something unfamiliar is to have a pressing reason to do so (combined with a healthy dose of curiosity.) As with any project, there are numerous driving philosophies that one may use as a guide for the entire process. Let me outline my own:
Purpose/Goals:
As with any electromechanical device that you decide to build yourself, there is a good likelihood that you can buy an off-the-shelf equivalent which outperforms your invention (and often for a lower cost). There are many reputable companies making submersible vehicles with outstanding capabilities and reliability. So the goal here wasn't to make something better than what's already on the market (at least not on the first attempt). Rather, the goal was to actually learn something by designing and making as much of it from scratch with as few off the shelf components as possible.
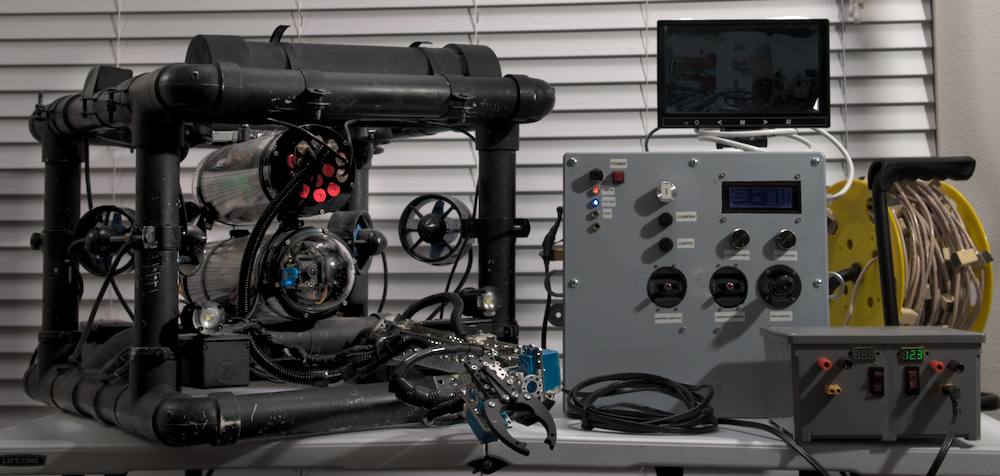
When deciding what components of the project you want to design from scratch and which ones you want to buy in "ready-to-go" form, it's important to take stock of what areas interest you and/or you want to gain knowledge about. While almost everything about an ROV was unfamiliar to me out the outset, in the interest of time I decided to forgo constructing things like the DC-driven thruster motors and a handful of sensors. I did however want to build my own control-device that could operate completely independent of a laptop computer (which is the manner used to control most ROVs on the market.) I also wanted to layout and build circuit boards of my own design driven by a microcontroller which I programmed myself in assembly language. As always, there are numerous components, boards, Arduino shields etc... that will do much of the heavy lifting for you and allow for a more "plug and play" setup but also abstract away many of the important details I wanted to gain competence in. For this reason, such an approach was not used in the project.
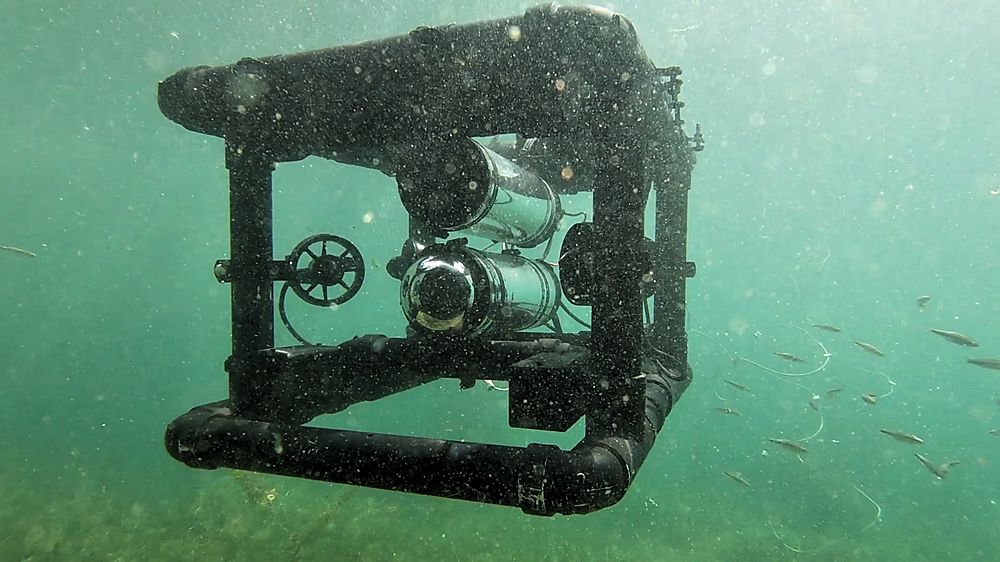
Design Overview (vectored thrust)
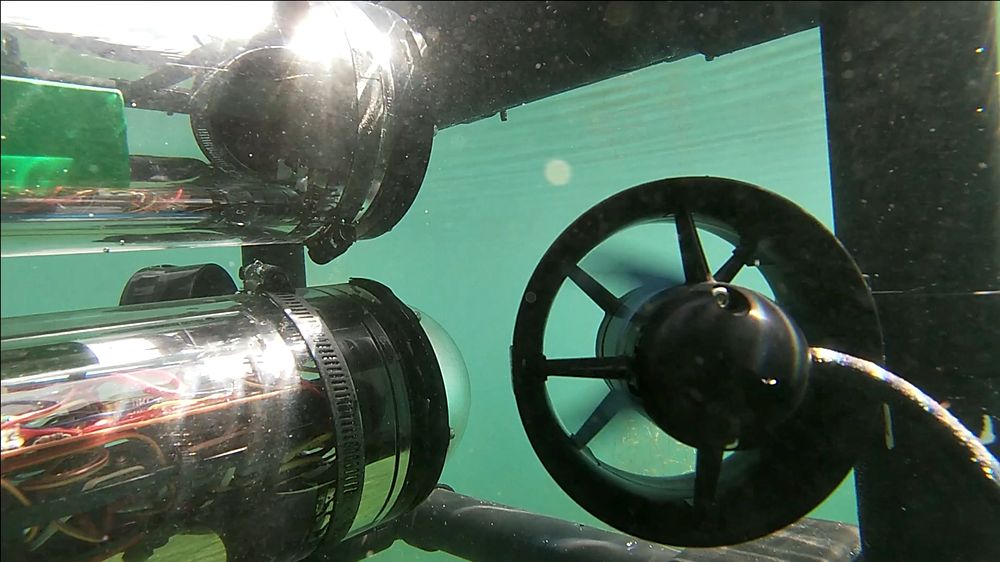
The concept behind the mechanical operation of this ROV is of the "vectored thrust" design. Originally I intended to have the direction of the thruster motors be controlled by servos attached to each individual thruster and point them in the desired direction. Like many things with this project I soon realized the problems with implementing this design (water leakage, more points of mechanical failure etc..) I soon found out that many ROVs use a vectored thruster technique for direction control. The design found here uses 6 thrusters in such a configuration. Four are placed at each corner (placed at a 45 degree angle to the vertical axes of the frame) and two more are placed so that their thrust points straight up/down for depth control. The benefit of this design is that the thrusters can be fixed rigidly in place and direction of travel of the ROV is controlled by altering the power of each individual motor. This allows for fewer moving parts, less complicated assembly and greater mobility. The major downside comes with the expense of the more complicated software required to control the system. The specific thrusters used for this project are the Blue Robotics T100s and can be purchased from Blue Robotics directly.
Perhaps the best place to start is with the frame construction. Doing this will allow for a visual understanding of what we are trying to accomplish which hopefully gives us a better understanding of the direction we need to be heading in when it comes time to write programs for the microcontrollers that will be running the system.